Showing posts with label handmade. Show all posts

Saturday, January 29, 2011

Clutch!

jill's hat

Trying to fight off the winter doldrums, it seems I’ve been spending too much time huddled in front of the stove and not enough by the warmth of my sewing machine light.  Apparently, it’s not a very warm light.  But prompted by the sale of a few Bean’s Clutches in my Etsy shop, I decided I better move away from the stove and make more before I’m all sold out.  So I turned up the heat (my creative juices and thermostat) and got to work!

Beans' Clutch

In a matter of a few nights this week, I was able to crank out 10 clutches, managing to use up all the oil cloth in my stash!  Which probably means that there won’t be any more Bean’s Clutches for a while.  Not a big deal.  I’ve been putting so many projects on the backburner, and I’d like to push my shop aside for a little while to get them done.  I’ve cleared a lot of items out of my online inventory, and I keep my fingers crossed that my onesie don’t get discovered by more than the occasional trickle of buyers.  I packed up the remaining scraps from my Bean’s Clutches and some fabric I purchased for new products and they’re off to the closet!

fabric bin

Thursday, October 14, 2010

The Handmade Laptop Bag

Jill  

I made a foolish decision. I purchased a 17” laptop.  This was foolish, because almost no where, on God’s green earth, can one find a laptop bag big enough to fit such a monstrosity of a computer.  At the time, I had no clue I would run into such a debacle.  I, blinded by the large screen and number pad, possessed not a clue into the lack of portability that would ensue when purchasing these features. So I’m sure you can figure out what I did…

A Laptop Bag Designed by Me!

I graciously helped myself to my stash of fabric make a perfectly sized laptop case for my over-sized, “portable” computer.

If you can manage to follow my steps, you may be inclined to try to make your own.  I used a 1/2” seam allowance and happily finished with a functional laptop bag.

Step 1: Seclecting the perfect fabrics.

I decided to use one of my prized Heather Ross fabrics, Natural Roses from Far Far Away 2, and some leftover blue fabric from the back of a quilt I haven’t quite finished yet…
Step 2: Cutting pieces for the inner lining and outside. I based the construction of the bag on a box with an open top.  I carefully measured around each edge of my laptop, then cut each side, adding to the length and width an 1 inch for seam allowances and 1/2 fudge factor.  (I couldn’t imaging going through all this trouble for the bag to be too small!)
Step 3: Practice by making the lining first. I made two sets of fabric boxes, one for the inner lining and one for the outer.  I made the inner lining first to test my design.  I sewed together the four sides of the box, then the bottom.  Before sewing on the bottom, I carefully pinned it in place.
Step 4: Make sure the laptop will fit in the bag! I anxiously “tried on” the laptop bag by slipping my computer into the lining.  It fit!
Step 5: Add some cushioning. Next, to add a little extra padding, I basted batting onto the inside of each outside bag piece.
Step 6: Create some unique handles. Using the top edge of my largest side, I sketched a creative shape for my handles on some trace paper.  With some fancy folding (in half) I was able to make them symmetrical.  (Please be aware that these handles serve a more aesthetic purpose than functional.)
Step 7: Add your own whimsy and charm. For fun, I was inspired by the Velveteen Rabbit and appliqué a little bit of whimsy on to my bag.
I created the outer shell of my laptop bag by duplicating my inner lining box construction, and sewed together the sides, then pinned and sewed on the bottom.
Step 8: Create and attach a flap for securing the bag closed. I created a flap for the top of my laptop bag, being careful to make sure it fit between my handles.  I made the flap close with a button hole, because I was nervous that if I tried velcro, the pieces wouldn’t line up.  I’m mad at myself for forgetting to switch from my basting thread to my finish thread.  Luckily, I remembered before stitching around the edge.
Step 9: Sew it all together. After basting on the flap between the back handle, I put the exterior bag into the lining and sewed around the top.  Through a hole in the side of the lining, I flipped the bag right sides out and lining sides in.
Step 10: Finishing Touches I edge stitched around the top for a finished look, then carefully attached the button into place
Now that's a handmade laptop bag! Now, I have a super cool, handmade, and one-of-a-kind laptop bag.  I think it’s really awesome!

Monday, October 4, 2010

Most Fun DIY Wreath Ever

Jill 

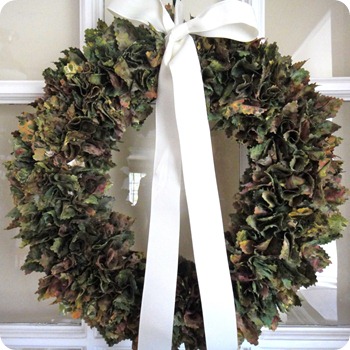
This has to be the most fun fabric wreath to make!  Super easy, inexpensive, quick, stress relieving, and turns out handsomely…what more could you want in a craft project?!

DIY Fabric Wreath

A friend of mine found this project on the blog, The DIY Show Off, and after trying it herself, insisted that I make one.  What a great friend!  I love admiring how beautifully this wreath came out and dreaming of what fabrics to make the next out of.   I finished this first wreath in about an hour.  It’s as simple as pinking some fabric squares then jabbing them into a straw wreath form with a screw driver.  (That’s the stress relieving part of it!) 

Close up on my "leaves."

The vine pattern batik I picked out at Joann Fabric (and purchased with a 50% off coupon!) was perfect for this project.  With the pinked edges, the wreath has a very organic texture.  I didn’t use any glue, and the fabric used totals a yard and a third.   My wreath didn’t have any bare spots, but there were plenty of places I could have added more fabric if I had it.

My fabric wreath hanging in my dining room.

I tied it with some grosgrain ribbon, and hung it from my old porch door.  Love it!  I can’t wait to make the next!

Sunday, September 26, 2010

Love Garland

 Jill

I broke down and finally unraveled a collection of brown fat quarters I bought in Lancaster a few years ago. 

 Fairwell Fat Quarter Bundle

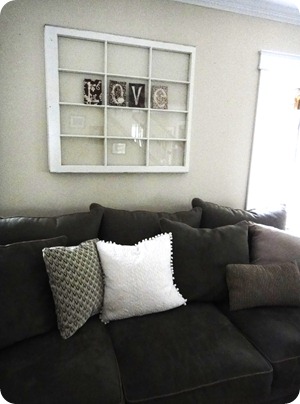
I needed a few of these fabrics to become backgrounds for name garland: my genius idea to decorate an empty window frame hanging in my living room.  MrBeans and I hung the old window pane over our couch a few weeks ago.  He really likes the reflection it produces, but it was a little bare.

Old window hanging in my living room.

I love making the name garland in Winsome Baby by Art to HeartSince I’ve never has the opportunity to make any person’s name with this garland, I’ve found other opportunities to have fun with this pattern.  I teetered between the words “love” and “home,” but the greatest of these is love, so it won.  I spent about an hour cutting and sewing together this quick project this afternoon.  Very sweet!

Name Garland from Winsome Baby

Monday, September 13, 2010

Monday, Monday

 You can't have this much fun shopping on Amazon.

Some Mondays live up to their name, and it’s possible that today, I did have “a case of the Mondays.”  To cheer me up, this evening I made sure to take the opportunity to do a little sewing.  I made three onesies this evening, and one of them has a springtime color theme.  I honestly prefer my standard blue/pink/green color scheme; however, I was genuinely happy with the way this one turned out.  Not a bad way to end a Monday.

custom onesies

Thursday, September 2, 2010

Happy Labor Day!

Waiting for a tasty milkshake. 

I just finished up a couple onesies before the holiday weekend!  I hope you have a great weekend!

Custom Onesies

I especially love this one:

I <3 My Auntie

Sunday, August 22, 2010

Watch out Barcelona!

Jill up close. 

Barcelona, Spain

Because I finally finished my Amy Butler Barcelona Skirt!  Naturally, I should take to the streets of Barcelona, and show those Spaniards the glory of my stitches!

Okay, so I’m a little overly excited that I actually finished this project.  My next, not to mention first, trip to Barcelona is not in the forecast-able future, so I’ll just have to show off this sweet summer skirt in the suburbs of Philly for the remaining, and altogether waning, days of summer.

My Barcelona Skirt

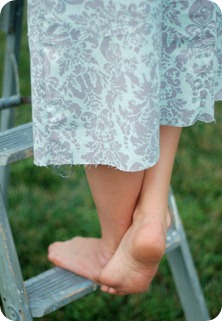
This is the first article of clothing I’ve ever made for myself, and I am beaming with pride!  I think it turned out very well, and I don’t want to give all the credit to Amy’s well written pattern; after all, I am the one who sewed it together. 

Hemline of my skirt.

I was really impressed with my seams matching up and the  invisible zipper skills that I didn’t even know I had.  This skirt came out much better than any of my quilts have recently.  I can’t wait to run it through the wash a few times for the unfinished edges to get their frayed texture…then I’ll really be ready to take it to the streets. 

Don’t worry, I’ve since hemmed the bottom.  I’m off now to find my next project…or maybe I should could finish an old one…

Tuesday, August 17, 2010

Zip Zip

Jill all smiles.

How can too much of a thing be bad, especially when it come to zippers, right?

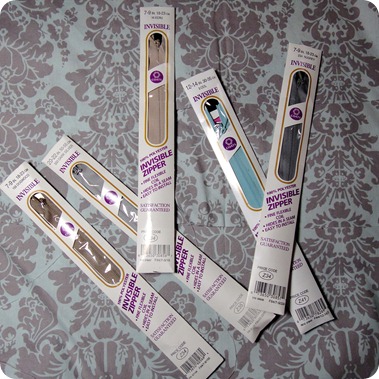
Zippers

I’ve finally got a kick start on my Barcelona Skirt!  Yay!  Unfortunately, when I went to put on the zipper, I realized that I purchased one that didn’t match.   Here’s a tip: bring a fabric swatch when you’re picking up the zipper. 

So, I sent MrBeans off to correct my blunder.

While I was out for the evening, I sent him off with a scrap of fabric, the old zipper and instruction to “exchange it for one that matched the fabric, blue or grey.”  Not wanting to make a mistake, MrBeans exchanged one zipper for several in different colors and sizes.  At least one of that had to be right, right?  Jackpot! 

Friday, August 13, 2010

Color My World

Jill

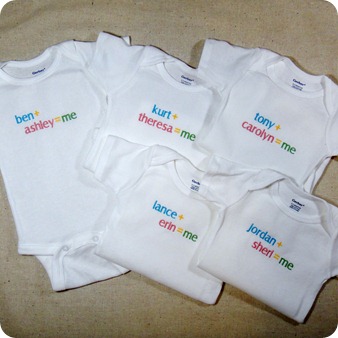
I really enjoy making custom embroidered onesies.  Of course there’s a lot of excitement for those with the promise of a “me,” and I love to think that mom and dad’s hearts melt a little when they see their names on baby’s chest. 

Custom Embroidered Baby Onesie

A typical onesie is embroidered in what I like to call “neutral baby colors.”  It’s perfect for a boy or girl; I always envision a baby boy in his little jeans and this onesie, and a baby girl wearing this onesies with a little tu-tu.

Custom Embroidered Baby Boy Onesie

Though, sometimes I to get a little more creative for specific types of babies…this one is for little Jack.    It’s fun to give other colors a chance! 

Wednesday, August 11, 2010

Busy Bee

Jill at the American Art Museum

So far, a typical day for me this week has been 10 hours at work, followed by a concert, meeting or rehearsal, then finally retiring home to embroider some custom onesies.  I’m not really complaining…it’s my husband and cats that always seem to think they got the short end of the Jill-stick.  So before anyone notices that I’ve been gone, here’s what I’ve been working on:

More Custom Embroidered Onesies by SewBeansMore Custom Embroidered Onesies by SewBeans

Thursday, August 5, 2010

St. Thomas

is the Patron Saint of Architects…or it it beaches?  In either case, he’s the guy for me!

Jill at Linquist Beach, St. Thomas

I recently spent a week hiding out from my everyday life on the beautiful islands of St. Thomas and St. John in the US Virgin Islands.  (And yes, I brought my beach bag.)  They are supremely gorgeous.  White sandy beaches, blue-blue water and uber friendly natives - this beach girl’s dreams come true.

Trunk Bay, St. John

If you know anything more about St. Thomas, than you know it’s a shopping haven.  Practically duty-free and no taxes, you can get some great deals.  But I made sure to take some time away from the tourist malls and checked out some shops with items produced by local crafters.   Here’s a couple of items you won’t find on Etsy, yet.

Kallaloo Beach House Magnet

I found this cute magnet outside of Iggies at Bolongo Bay.  Wednesday nights are Carnival Nights at Iggies.  Along with a show and all you can eat feast, they feature local artisans displaying and selling their handicrafts.  Being a residential designer, I loved this beachy cottage.  A must-have since I saw the sunset in the “window” just that evening!  It was created on St. Thomas by Bridgette Julius of Kallaloo Cards & Gifts.

Jans Creations by the Sea earrings

At Jans Creations by the Sea, an adorable little window shop in Coral Bay, St. John, I snatched up these  beautiful wire and crystal earrings.   I had so much fun chatting with Jan about the island, and even wore the earrings the next night!   You’ve got to check out her website to see just how cute her shop is!

So now that I am full speed ahead back into my everyday life, I think I’ll still dream about relocating myself and my sewing machine to a tropical paradise like these “smart” St. Thomas and St. John crafters; I’ll just have to keep telling myself that sand and sewing machines don’t mix.

Jill at Coki Beach, St Thomas USVI

Sunday, July 18, 2010

Prairie Points and Hexagons

Jill

Prairie Flower Pincushion in Progress

This was a Sunday of firsts!  The first time I used transparent poly thread, the first time I made hexagons and the first time I made prairie points!  Very excited about all three, I’ve been anxiously plowing through my Prairie Flower Pincushion pattern and kit I got on my trip to Olde City Quilts, and by the looks of my stitches, I’ve probably been moving a little too quickly.

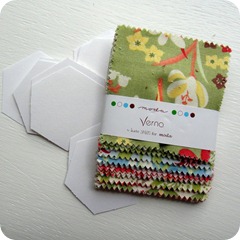
Moda's Verna

The kit came with two charm packs of Moda’s Verna, 1” hexagon templates, batting and the printed pattern.   After pawing over a couple of the samples in the shop and enjoying the summery colors of Verna, I decided that maybe I really did need another pincushion.  (And, my 93-year-old Pop has a girlfriend named Verna, so I figured it was more the coincidence!)

At this point in the evening, I’m a little too tired to  finish, but stay tuned…do you think I’ll have a new pincushion tomorrow??

Wednesday, June 30, 2010

Goodbye to June

My favorite month is nearing the end.  June is the best for many reasons.  It’s the beginning of Summer (this beach girl’s favorite season,) birthdays, anniversaries, and it’s flanked by two three day weekends, Memorial Day and July 4th…What’s not to love??  It’s sad to see another June ending.  At least there’s still two more months left of summery weather!


Speaking of summery weather, for Christmas last year, I received Amy Butler’s Barcelona Skirt pattern, and while exploring some quilt shops on my birthday, I picked up this damask fabric (from the House collection by Annette Tatum for Westminster) to make one out of.  I’m very excited...I just hope I can find the time to make it this summer while I still have a chance to wear it!