Nests of thread? Holes in garments? Off-kilter designs?
I've sweat; I've cried; I've thrown my hoop across the room. Nothing is more frustrating than ruining an embroidery project within the first few stitches. Which goes without saying, that the best way to get that project finished is starting it, correctly.
Once I calm down from my mistake, I vow to "never do that again." Truthfully, I probably did do it again, but once I realized exactly what I was doing wrong, I found I completed more and more projects successfully. These tips may seem obvious, but if I don't intentionally think through them, I'll end up with disaster. Here's my perfectly prescribed method to successfully starting a home embroidery project. (I've just jinxed my next project, right?)
First, take in a deep, relaxing breath, then follow my tips and tricks:
1. Start off on the right foot, and with the right foot! Take extra care in setting up your machine and embroidery module. I've learned to take deep breaths in between every step to assure myself I'm not rushing through anything. (Haste makes waste!) Make sure you follow the manufacturer's specifications "to the t." I've given my machine plenty of room, made sure everything is tight and secure, and wound my bobbin with matching thread for embroidering letters.
2. Always use a new needle. Or at least one that's been barely used. It needs to be sharp, so it can slide through the layers of fabric and stabilizer neatly. I also always re-thread my machine directly into my needle. I am very easily distracted; if I threaded my machine, or half-threaded it (gasp!) then came back to thread my needle later, it usually got cross with me.
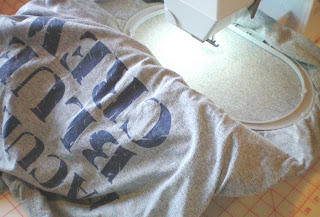
3. Always stitch out your design on scrap material first. An old high school t-shirt work great for this! Sometimes the belt in my embroidery module would get a little loose, so stitching the design out first (often not the whole thing) assures me that the machine is working correctly and the design is grade A.
4. Perfect placement the first time. Whether I'm embroidering a t-shirt or a onesie, I pull out my ruler and my air-erasing fabric marking pen. Line up the ruler directly below the armpits of the shirt and mark with a small dot at the center of the garment and then a couple more a inches away in each direction to make a straight line. Hooping is one of my least favorite things, but this always guarantees me a straight design and perfect placement.
5. Make sure you hoop is secure, take another deep breath, and start stitching. One final cliché, slow and steady wins the race. (Sometimes, I actually will set up my machine to stitch smaller more delicate designs a little more slowly.)
Once I've started the project perfectly, I find there's little that can mess up my design now. I was told I could go do the dishes while my machine embroidered away, but I never wander far! You never know when something might get caught or you run out of thread!
I followed my routine and with great success! Another completed embroidery project and no temper tantrums or wasted materials! Now if I can only find my rotary cutter so I can get back to some of those other projects...


No comments:
Post a Comment